
If you’ve ever been interested personal note-taking in the digital space or even just Googled “workflow” you’ve almost certainly been exposed to Obsidian and the idea of a second brain. Yet, the way people talk about these ideas starts to feel magical instead of realistic and they quickly look more complicated than useful.
In reality, Obsidian can be an excellent way to have a quick digital diary, and can be used completely free. Here’s how to get started quickly.
Why Use this Beginner’s Guide
This guide won’t use advanced terms, mods, or delve into unnecessary features that simply serve to look pretty in data visualizations. It’s also in a quickly skimmable word-and-picture format instead of a video you have to sit through.
By the end of this guide, you should have a fresh Obsidian vault and feel confident making daily and recurrent journal entries in it.
Step 1: Install Obsidian
Open Obsidian’s download page and… you know what to do.
Step 2: Create Your New Vault
In Obsidian’s main menu area, click “Create new vault” and pick a name and location for it.
Step 3: Create an Images Folder
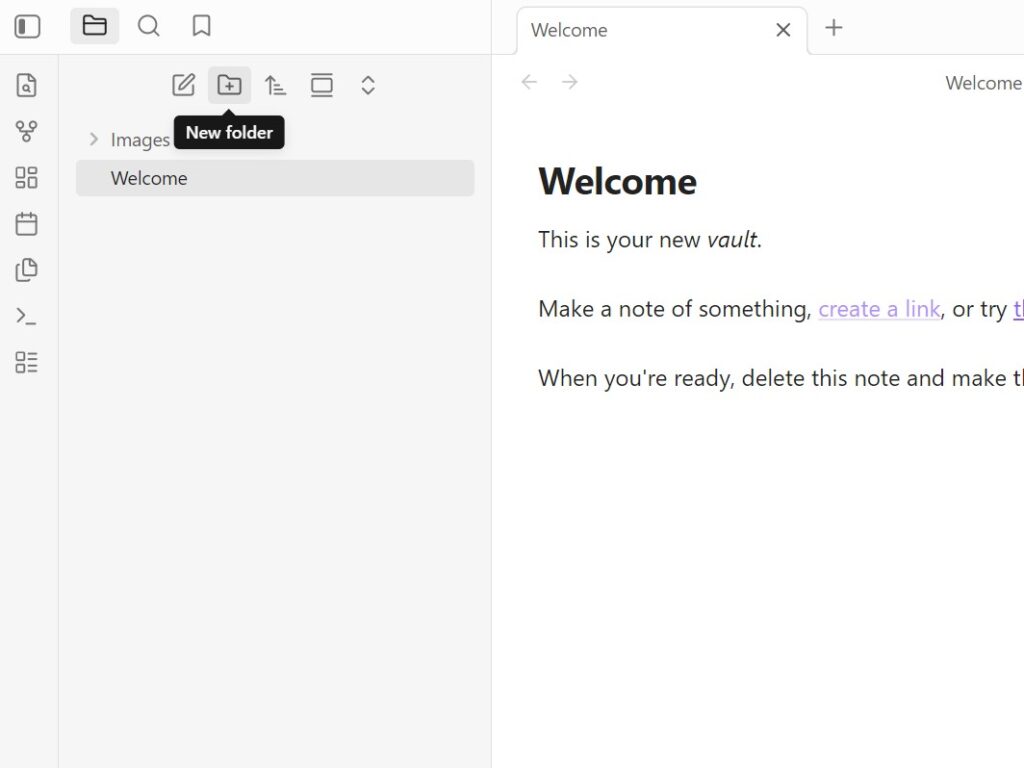
Click the folder-with-a-“+”-inside icon to create a new folder and call it “Images” – we’ll be using this in the next step.
Step 4: Choose Your Initial Settings
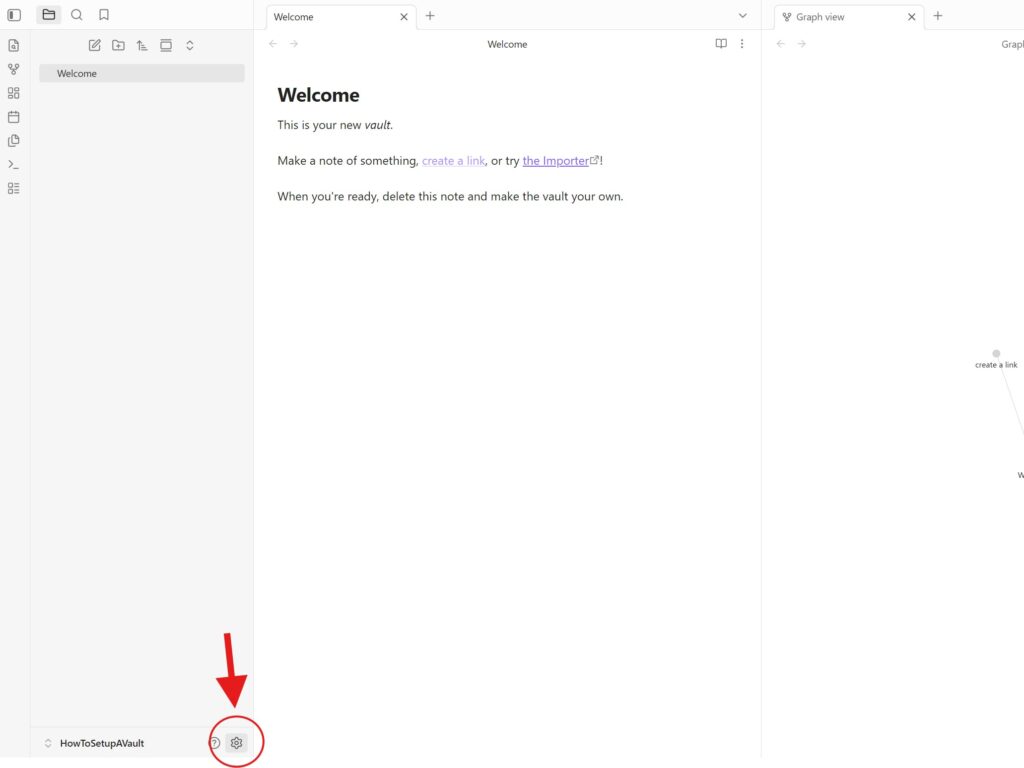
Click the cog next to your vault’s name in the lower-left corner to open the settings menu. Here are the basic settings to get started with Obsidian as your daily journal:
- Click Files and links in the area to the left. Select the dropdown menu under “Default location for new attachments” and choose the option “In the folder specified below” to open up a new option labeled “Attachment folder path” – Here, select the “Images” folder to create a dump folder for images. This way your file explorer won’t be clogged with images later if you choose to use them.
- Find Appearance and select “Base color scheme” to change Obsidian to dark mode, if you wish. Later, you can come back here to mess around with fonts, themes, and more.
- Go to Daily notes and choose the date format that you’re most comfortable with.
Step 5: Start Your First Daily Note
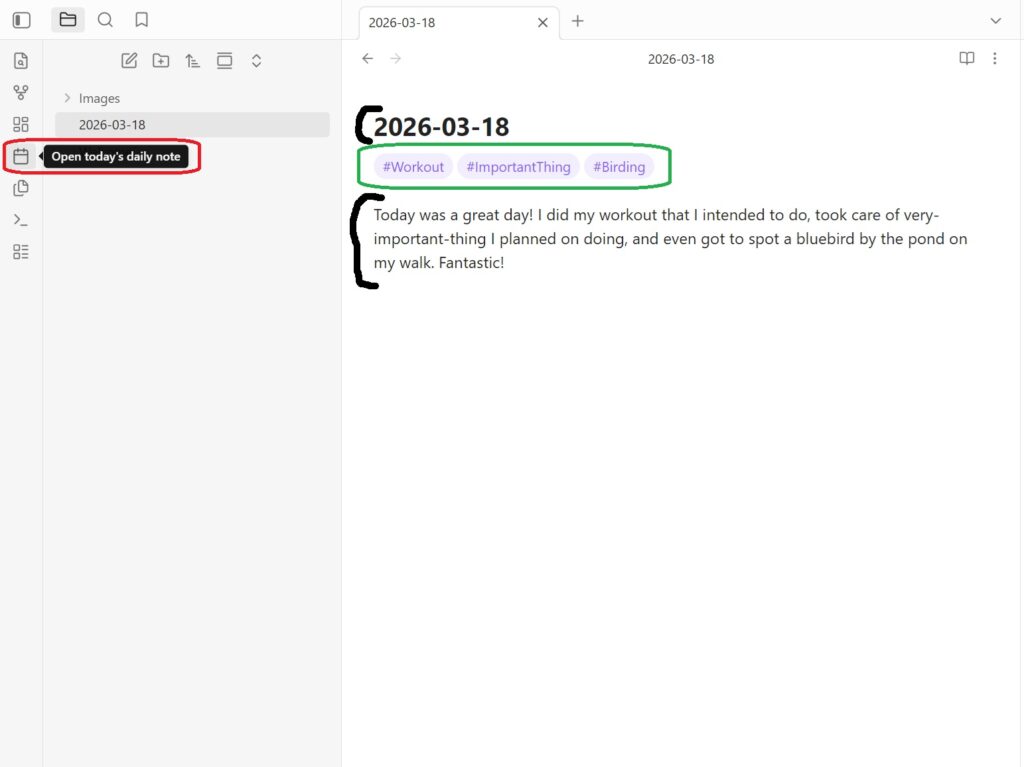
To start your first daily note, press the calendar button on the bar to the left (circle in red above). Each daily note is automatically titled for you in the date format you selected above. Daily notes are created for each day that you use the “Open today’s daily note” button and, if you use the button multiple times per day, you’ll return to the same note. It’s slightly annoying if you stay up past midnight, but nothing is stopping you from choosing the previous day’s entry in the file selector. If you skip days no notes will be created for those days.
Notice in the image above that I start with tags. Make these by using a single “#” with a word or two (without any spaces afterwards) in any spot. Tags help you find information later. For a daily activity log, that can be especially helpful. Imagine clicking on #NoDrinkDay or #Reading and finding all of the days that you’ve skipped drinking or done significant reading. Try to keep tags simple and repeatable, never too specific, to make them maximally useful. A tag you can use 10+ times is nearly always more useful than one you can only use once or twice. That being said, feel free to experiment with word/number combos and the like.
I tend to do tags in a single line and do the text of the entry below. You don’t have to do it this way, however, and can #insert your #tags in your #text like this if you wish.
Next Steps
This is just the beginning with Obsidian. You can add plug-ins, create your own personal mini Wikipedia/website model, or enable cloud syncing for a more complete digital archiving setup. However, if you’ve been previously intimidated by the software, don’t be as you’ve already done everything essential via the guide above. From here on out, you can explore more features as needed, or just stick with this setup.